


I don’t think I would describe my Mom as artistic. She can’t draw a lick, isn’t at all mechanically inclined, and doesn’t particularly enjoy tedious processes. She likes to say she’s a good “copier” as in she can see an idea in a magazine and recreate it. But I think it’s more than that. I didn’t realize until I was older that not everyone’s homes are as inviting and comfortable as ours always were. She has a great sense of color and design and she used it to make our home a pleasant space to live our lives in. I didn’t really grow up around a sewing machine, but my Mom did dust it off to make us matching red taffeta Christmas dresses one year, and always handcrafted our Halloween costumes. She must’ve done a good job at it because they made the rounds between all three of us kids, a few cousins, and are still packed away for the grandchildren’s play time. My Mom is left handed, so it made teaching me to crochet a little more difficult than it needed to be, but she was patient with me and I have the blankets to prove it. Some of my favorite Mom-and-me time was spent perusing craft shows nearly every weekend in the holiday months and our Sunday trips to the local craft store. Although she doesn’t keep up with it now (we’re back to that tedious bit) she introduced me to scrapbooking, so I have her to thank for inspiring the 13 albums I've crafted which are among my most treasured possessions.
My Dad has more tangible artistic abilities. He worked a night shift when I was very young and would wake me up some nights when he got home to show me an elaborate pencil drawing he had just done to help explain/teach me about whatever he thought I’d find interesting. I was completely amazed when he illustrated the lenses of the human eye and how we actually view objects upside down. He’s very mechanically inclined and used that talent to fix anything around the house that was broken, but also to figure out unique ways to create images with a camera, like the time we went outside at night and set up the tripod to take a picture of me as he moved a flashlight around me. The effect made it look like I was glowing… like a ghost. For a good part of my childhood, my Dad had a passion for woodworking which he came by through his own father. I still remember the crispness in the air as I stood in my grandfather’s or our own garage watching my Dad turn raw wood into furniture, toys, tools or pretty much whatever anyone could dream up to add to his list… and it was a long list!
I’m so thankful that my parents nurtured my creative side! The process of making and the resulting creations are so fulfilling for me that it’s become a part of my daily life. I hope that my own child will be familiar with the sense of accomplishment I feel from creating something out of nothing, but more than that I hope to instill in her, what my parents fostered in me; a deep appreciation for all things handmade.
Friday, August 29, 2008
Growing Up Crafty
Wednesday, August 27, 2008
Create a Product Display
One of my favorite things about doing a craft show is planning the display! I love seeing all my labored over pieces in one spot arranged in a creative and fun way. I’m only planning to do 2, possibly 3 shows this year in Nov. and Dec. but I’m already mulling over display ideas in my mind. Nearly every show I’ve participated in I’ve displayed my wares in a different way, but along the way, I've come up with some basic ideas that have stuck and worked well for me.
- There’s some controversy over this one, but I believe that in most circumstances, customers don’t want to walk into your space. I have a theory that they’re a) uncomfortable getting that close to a stranger… if you’re only talking 10x10 with a bunch of stuff, that’s definitely personal space and b) they’re lazy… they’ve come to the show to leisurely stroll not fight their way into a space already filled (and if it’s small, it only takes 1 or 2) with people while they try to avoid bumping into tables and getting caught up in hanging items. So if at all possible, set up your space with everything at the edges.


- If you have a product that may require any explanation at all, try to convey that in as simple manner as possible, preferably visually. Again, those lazy shoppers just want to see if anything catches their fancy, I don’t think most are there to scour through every booth trying to uncover your creative genius. For example, some people aren’t familiar with slings, so I have a mannequin (affectionately referred to as “Moi”) that I set up next to the sling rack with a baby doll in “her” sling and I hang pictures with 3M hooks on the rack of the various carrying positions. I also set up a restaurant style highchair to display a cart/highchair cover instead of expecting them to read about or inquire about what is in the adorable draw string sacks.
- One of my favorite newly acquired tricks is to raise my table. Amongst a sea of other tables, it’s a really great way to stand out and it brings your items closer to eye level… I’m telling you… you’ve got to cater to those lazy shoppers, don’t even make them bend over! You can pick up a set of those bed risers at a home goods store to stick under the legs of your table. Depending on how your table is configured, you may be able to extend the legs with PVC pipe, or if you’re feeling particularly creative you could even make your own PVC/plywood table. An added benefit is that it raises your table enough to display your banner there if you’re at an indoor show without a tent or if you’re using every other space for product display.

- I want my space to look like a little boutique transplanted itself there, not like a garage sale! If you head into a boutique, what sets it apart from say Wal Mart? The displays, the props, the fixtures. If you need a clothing rack and you’ll use it every show, invest in a nice looking professional one. You can get them on Ebay or at a local fixture refurbishing shop if you have one. If you see a shop having a going out of business sale ask about their fixtures. I got my waterfall rack that I display my slings on at a boutique that was moving to another location for $25. I also really love props! My favorites are a set of little nesting suitcases that are so versatile (hat boxes would work too). I can stack two or all three, have one open by itself, display things on top of a closed one and they double as storage. Discount stores like TJ Maxx and Marshalls always have interesting fabric covered boxes, there are lots of alternatives to the traditional and less stylish basket. Look around your house, I’m sure you have stuff you could use to create levels and help display products. I displayed some items in a little Euro styled children’s push cart at one show and have a super cute white feather table top Christmas tree that makes an appearance at every holiday show.

I’m trying to be conscious of writing mini novel length blog posts (admitting you have a problem is the first step right? Seriously though, these wide margins make it appear even worse than it truly is!) so I’ll end it there. I hope those of you gearing up for the holiday craft show season found something useful here, have fun with it!
Tuesday, August 26, 2008
Etsy's Handmade Kids Sweepstakes Update
I've gotten so many sweet emails from customers, collegues, friends, and family congratulating me, wishing me good luck, and voting for me. Two of my fellow Etsy sellers even posted links to my items on their blog and Flickr account!
http://akdesignsboutique.blogspot.com/2008/08/congratulations-stacey.html
http://www.flickr.com/photos/eraphernalia_vintage/?saved=1
How awesome is that?! This experience has already been so fun and I truly appreciate it! So thank you all very much, and if you haven't voted yet, now is your chance!
Can I be honest?
I really don't get the fancy burpcloth thing! Seriously, they just spit up on them, why does the spit up need a pretty spot to land? I will admit that Elle was never very burpy, I didn't use them that much, so maybe if I needed one every waking momment I would've wanted them to resemble an accessory... but if they do spit up a lot it's not going to stay pretty very long. So that's been my take on the burpcloth thing and I've avoided making and/or selling them despite the fact that the embellished ones are relatively popular in baby boutiques and on Etsy.
Enter good Elle Belle customer who asks me to make some for her little guy and since I'll be buying a packag e of 12 and won't sell them in my shop I may as well make some gender neutral ones for a shower gift she's giving to a Mommy who doesn't know if she's having a boy or girl. I'm up for the challenge particularly because she's such a sweet repeat customer.
The more I thought about how to decorate the burpcloths, the more into it I got. It was almost like a throw back to my scrapbooking days of planning out a page at a time. I decided to do 2 sets of 6. Each set with 3 with a cotton fabric pannel and 3 embroidered. I just bought some handy dandy applique scissors that I haven't gotten much use out of so I used this opportunity to figure out how to create an applique letter with the embroidery software I have. (I'm pretty sure that wouldn't be interesting to anyone but me, but if you happen to have embroidery software, but don't digitize, and are interested in how I created my own applique font comment here and I'll put together a little tutorial, I'm so proud of myself for figuring it out! :)) I broke out some embroidery designs that I've picked up along the way but never really had any use for and used up some fabric scraps that I loved too much to pitch, but didn't have a purpose either. I also really love the immediate gratification factor and I'm really happy with how they're turning out so far.
I still don't really get the hype, but for purely selfish reasons, I think I'll keep making them... well as long as people want them. I even posted my favorite set so far in my shop.

I couldn't completely conceal my true feelings, I'm calling them Pretty Spitty. Hee Hee, I think that's so funny!
Monday, August 25, 2008
Oh-my-Gosh-oh-my-Gosh-oh-my-Gosh!!!
I'M A FINALIST IN ETSY'S HANDMADE KIDS SWEEPSTAKES!!! I'm so honored, and beyond excited, but I'm only half way there, I need your votes!
Okay, I'm going to settle down at least enough to not add 3 exclamation points to every sentence and tell you what all the hullabaloo is about. Etsy ran a feature on all the wonderful baby/kids/parent stuff you can find on Etsy and part of the feature was a contest, the handmade kids sweepstakes. Tons and tons of Etsy shops entered their products to be considered for 7 categories (you could only enter one product per category). I entered the eco friendly, accessories, toys, clothing and home decor categories. Etsy's staff selected my count and spell color recognition beanbags in the eco friendly category and my Tattoo inspired ring sling in the accessories category to be in the running with 40 other shops to win the sweepstakes.
Special thanks for the time contributed by the panel of judges from Boingboing, Cookie, decor8, Martha Stewart Living, Ohdeedoh, Parents and Treehugger (can you believe they'll be checking out my shop?!) who will be selecting the winning shops along side YOU!
I'm so NOT above begging! Please please please go to Etsy's handmade kids contest voting page and vote for my beanbags - eco friendly and tattoo inspired sling - accessories!!! And while you're there, definitely vote for other amazing Etsy artists who are finalists in the other categories! Did I mention you can win a $350 shopping spree on Etsy just for voting?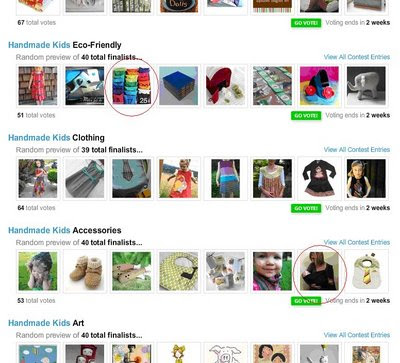 I'll back away from the exclamation point now.
Sunday, August 24, 2008
Featured Etsy Seller - Tulips Treasure Box
I just joined the Etsy Blogger team. I'm so proud of myself for keeping my commitment to post more regularly on my blog and decided I should take the next step and make a commitment to an entire team. The Etsy Bloggers are, as you could probably guess, a team of people who have Etsy shops and also blog. I knew the team existed, but the Storque just recently did an article about them so I got to learn more about them. I think I'm really going to like how organized they are, how they hold everyone accountable to participate, and that for someone who is already dedicated to blogging, there's not an unreasonable amount of commitment required.
Each month, they select a member of the team for everyone to blog a feature on. So, my first official assignment is to feature Tulips Treasure Box:
Lily of Tulips Treasure Box designs and creates some really amazing jewelry! I particularly like the thorough descriptions she gives of each piece, some of which include background information about the materials she uses, like this one for her Caribbean Necklace and Earring Set: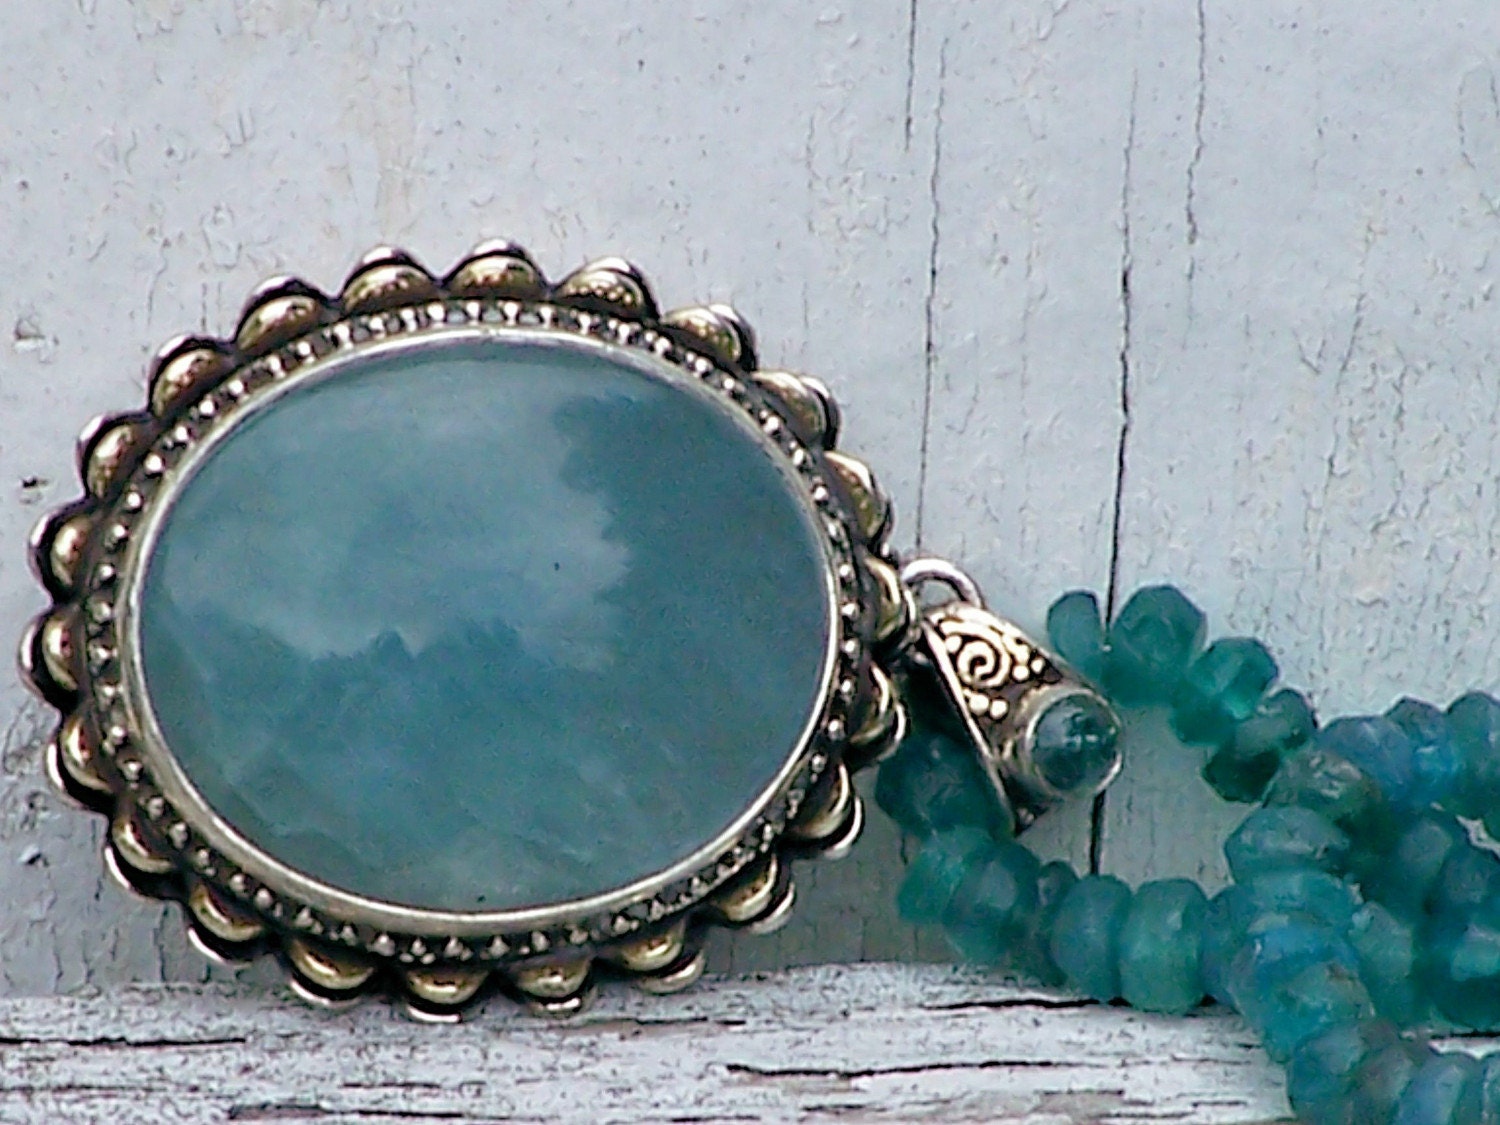
Bright sea-green Apatite is regarded as a gem for collectors as well as for jewelry makers. Its name comes from the Greek word for "deceit" since it's so often mistaken for such stones as beryl, topaz and tourmaline. The green variety is sometimes called asparagus-stone.

She also creates these adorable eco friendly Tee Totes. Not only do they serve the eco friendly purpose of reducing waste of plastic bags, they're constructed from recycled Tees... they're an environmentalist's dream!
So head on over to the Tulips Treasure Box shop, plan your next fabulous outfit around one of her beautiful pieces of jewelry, and do something good for the environment!
Saturday, August 23, 2008
Amy Butler's little stitches for little ones Book Review
 This morning I went into Fiberologie, this awesome new fabric shop in St. Pete, and there on a top shelf with a light shining on it like an angel's smile was Amy Butler's new book: Amy Butler's little stitches for little ones. I couldn't believe it, I had no idea she was working on a new book, let alone that it was for little ones. How is that for a sweet surprise!?! I'm only a little bummed that I didn't get to enjoy the anticipation of her latest bit of inspiration.
I've flipped through it at least 3 times already. It's formatted really similarly to her In Stitches book, with the hard cover, spiral bound insides that lay flat when open, and the pocket for the sturdy paper patterns. There are 20 super cute projects and some fabulous photography. Some of my favorites are the soft blocks, an adorable top/dress, and I can't wait to make the snuggie baby wrap! Mommies to boys will be happy to know that it's not all just girly girl things. There are cute accessories for the nursery, some fun stuff for Mom, and the kimono PJs (another of my favorites!) are gender neutral in style. There doesn't seem to be as many drawings to follow for us visual learners, but the text is really thorough.


Friday, August 22, 2008
Stocking or Basket Stuffers
This is a really sweet little craft that makes an awesome stocking stuffer, or in the case of these pictures, a fun addition to an Easter basket. They're also a great project to do with your little one, not only can they actually help with this easy process, it helps promote color recognition too.


Wednesday, August 20, 2008
Gotta Love Props!
Check out the super sweet things my customer, and fellow Etsy shop owner, Cheryl of EraPheernalia Vintage had to say about the revised count and spell beanbags:
I am an educator with 15-year's experience teaching art to public school children. I bought these for my 2 1/2-year old grandchildren who are fraternal twins.
These beanbags are just perfect with the beautiful polkadotted fabric and the bright coordinating solids. The letters and numbers are easy to read, and the heft and sound of the beans inside is very pleasant. These great beanbags appeal to active children who are sensory and visually oriented. There are so many things that the children can do with them. They just beg to be played with!
Everything about them is satisfying and Stacey is a dream to work with. I highly recommend both them and her.
Cheryl Davis
Eraphernalia Vintage on Etsy
How awesome is that?!?! Seriously, I'm so excited about it that I added it to the listing.
You can also check out Cheryl's Flickr photostream here!
Tuesday, August 19, 2008
Doing a Happy Dance!
We got accepted into Atomic Holiday Bazaar! It’s such a fun event; I’m really excited that we get to be a part of it again this year! It’s actually the only show I’m planning to do this year so there’s no excuse for not having a ton of inventory ready and waiting to be scooped up by all the hip shoppers that come out for AHB. I thought maybe if I put it in writing, even this far in advance, it’d help me focus on a goal and hold myself accountable to you all for the inventory I want to prepare. So, here you have it, my to do list for the next couple of months:

Monday, August 18, 2008
Princess Sminshess!
In the last couple of weeks, I've been doing a few projects that aren't for Elle Belle... what a novel idea :) A good friend of mine has a daughter just 6 weeks older than my Elle. She had a birthday party last weekend and I waited until the day of to figure out what we should give Amelia for her birthday (I'm never so last minute, but it's been crazy lately). Elle is really into painting these days, so I figured Amelia probably was too, and went by Toys R Us to find some painting supplies. They had surprisingly VERY little to choose from. So I picked up a set of brushes that have paint in them and decided to whip up an art apron. I haven't made an apron before, but I figured... how hard could it be?! "Not too" was fortunately the answer :)
The hardest part was that I wanted to use oil cloth and it was impossible to find. I ended up with "oil cloth" (in quotes). I don't think the cottonish backed plastic stuff people call oil cloth these days is actually traditional oil cloth... it's cheap plastic table cloth. But even that stuff was in really limited supply at JoAnns, I called 2 other local fabric shops and they described the 3-4 prints they had that wouldn't work. So, I litterally cringed as I brought the huge roll of Disney Princess table cloth to the cutting counter at JoAnns. I don't know why, but I have a thing for Princesses... an I HATE THEM! thing for them. Maybe it's that they embody my distaste for the commercial/branding/unoriginal. But, I do recognize that I may be the only one on earth who has a problem with them and that many girls in fact really love them... this gift after all was for Amelia... not me, and unless I expected her to be excited about looking like a picnic table adorned with a red and white checkered table cloth, it had to be Princesses.
I bought matching binding, and a small set of D rings. Measured Elle for length and width, made some cut outs to give it that apron shape, added a pocket, and finished it all around with the binding. Oh and of course... just cuz I can... embroidered her name.
Saturday, August 16, 2008
I'm on a roll
Yet another new Elle Belle product! Linen Water.
I racked my brain trying to come up with a way to add scent to the new sensory snuggly and finally settled on linen water. The only draw back is that it doesn't last that long... so I decided to make my own and sell it in my shop too... problem solved! I found a recipe online that I like and is all natural. I just had to figure out packaging. There are a few places to get bottles and spray lids, but I wasn't totally in love with any of the them except one company that sold them only in bulk. I emailed them to inquire about a smaller order and a sales rep said he'd send me a sample of the bottles for free. I figured that would at least get me started and buy me a little time to find some more. They arrived promptly... without lids :( I emailed him back to please forward some lids and haven't heard from him yet, so we'll see. In the mean time, I found substitute lids that will work if I have any orders before I figure out a permanent solution. I used rub on letters to indicate the scent on the bottle and am pretty happy with how that looks and the picture I took as well:
 Let me introduce you to one of life's little luxuries, linen water! Spray on dress shirts, bed sheets, your sensory snuggly (Check out my other listings) or any other material you'd like to add a faint but perceptible scent that gives an enhanced sense of freshness. The application of a hot iron helps to infuse the scent into the fabric, ensuring that the aroma will be enjoyed for an extended period of time.
Elle Belle's handmade linen water is all natural. Choose one of the scents below and be sure to let me know which one you want when you check out. If you're purchasing the sensory snuggly to give as a gift, this is the perfect addition!
Lavender - Aromatherapy benefits: balancing, soothing, normalizing, calming, relaxing, healing.
Vanilla - Aromatherapy benefits: comforting, promotes feelings of love and compassion.Sweet
Orange - Aromatherapy benefits: cheering, refreshing, upliftingBefore applying the linen water,
it is a good idea to make sure the fabric will not react to the product by staining or spotting. Cotton often works very well with linen water, while some synthetics may demonstrate a tendency to spot or discolor as a result of the combination of the linen water with a hot iron.
Wednesday, August 13, 2008
I'm such a lucky crafter!


This corner of my space is home to some of the only tchotchkies in the house, my Lladro Polar Bears. My husband gave them to me one at a time as gifts for birthdays and Christmas at a time in our lives when they were a pure luxury that frankly, we couldn’t afford. I love them and although there really isn’t space in this room for decorations they make me smile, so there they sit next to a collage of our wedding photos. I have two of those short open shelving units, each flanking the French doors. More of the pink bins hold fabric scraps, and my most ingenious storage solution, a table top metal binder thingy that holds sleeves for all the stickers and die cuts (I was a scrapbooker in another life… the one before sewing) that adorn my packages now. The clothes hanging in the corner are on a wire cable my husband strung the length of the room for me. Right now it holds blanks, and my daughter's wooden butterfly mobile that's in need of repair, but when I’m getting ready for a craft event, and have a large inventory, I hang completed slings & works in progress from it on shower curtain hooks I found.
Sunday, August 10, 2008
It doesn't flash/buzz/play music/integrate, it's Count and Spell beanbags with color recognition
As promised, here are the pics of the count and spell color recognition beanbags. They're finished and I really couldn't be happier with them! Since my last post, I filled them with what else... beans!... dry navy beans to be exact (they give them the perfect good ol' fashion bean weight, sound, and feel) pinned them all, and stitched them shut with invisible thread on top and black thread in the bobbin (see post below).


 I'll post the listing in my shop tomorrow morning for sets of 6 and a full alphabet and then head to the post office to ship these 26.
Saturday, August 9, 2008
I heart invisible thread!
I wasn't 100% happy with the finishing stitch on the sensory snuggly... I missed how the decorative stitch from the tag blankets gave the blanket a really polished/finished look, but I didn't think I could incorporate a top stitch on the snuggly because of the variety of texture, naps, and color of the quilted pieces. But I was talking it over with my friend and partner in crafting crime, Anne (who makes all the delicious Elle Belle quilts) and after discussing about 3 other possible solutions we had an "A Ha!" moment... invisible thread!

 another dimension to the geometric/linear design of it. Since the top is invisible thread, it almost makes it look embossed. The bottom thread is pink or blue depending on the snuggly. I'm off to make a boy version (fittingly, for Anne's new son) so I can add pics of the new way to the listing. What do you think?
Monday, August 4, 2008
Special Delivery from the Storque!
The Storque is Etsy's electronic newsletter of sorts. They post articles on a regular basis and feature sellers. The articles scroll at the bottom of the home page with little links and pictures of the featured sellers appearing next to the teaser. The Storque has been doing an ongoing series called Handmade Kids. They've put together a lot of great articles on finds on Etsy, being a Mom and running an Etsy shop, they're having a contest for the best handmade kids stuff on Etsy... lots of everything pertaining to kids. I've been keeping up with the articles but was a little behind and read a few days worth yesterday. Lo and behold, my little man tie onesie was featured in a Storque article. I didn't actually get to see it appear at the bottom of the home page, but I'm still super stoaked about finding the article! Here it is:

Sunday, August 3, 2008
Treasury
YIPPEE! My Etsy Orphan shirt made it into a Treasury of other wonderful Etsy Kids stuff. It's such a treat when someone (like MaryElizabeths - check out this awesome dress of hers!) picks one of your items to promote :) View the Treasury by clicking on it below.


