Monday, October 24, 2011
Halloween Inspiration
Posted by
Stacey - Elle Belle
at
1:53 PM
1 comments
![]()
Labels: caramel apple bar, halloween party, make your own caramel apples, party
Saturday, October 22, 2011
Bloggy Booot Camp
After 4 years of blogging (i.e. writing a crafting/sewing/bento/party diary that just so happens to be shared with the world) I decided it was time to figure out exactly what I'm doing and/or should be doing with this whole blogging thing, so I'm in Atlanta today for Bloggy Boot Camp. Here's to a day of motivation, inspiration, and owning the title of "blogger"!
Speaking of, Atlanta isn't owning up to its"hotlanta" title this morning... I parked 2 blocks away and am pretty sure one of my toes has frost bite.
- Posted using BlogPress from my iPad
Posted by
Stacey - Elle Belle
at
5:48 AM
3
comments
![]()
Tuesday, October 11, 2011
Disney Outfits
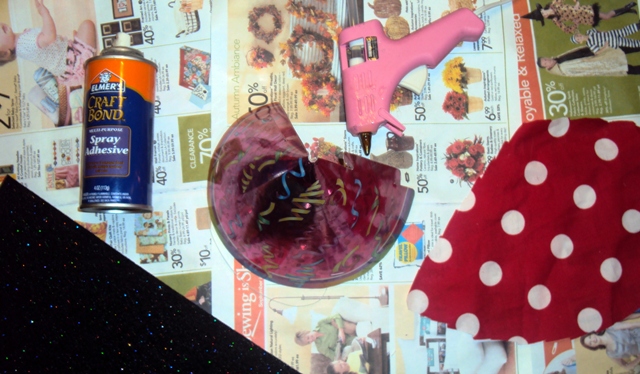
- unhook the tab on the party hat so you can open it up and lay it flat.
- rough cut the fabric about half an inch bigger all around the hat
- spray adhesive over the outside of the hat
- lay the hat onto the fabric and smooth it out
- run a bead of hot glue along the inside edge of the hat, pull the fabric around the edge of the hat and press it into the glue.
- repeat until all the raw edges of the fabric are glued down to the inside edge of the hat.
- using the exacto blade, cut a slit in the fabric where the slit for the hat tab is
- insert the tab into the slit to put the hat back together
- Embellish your hat:
- If you're making the ears, you'll cut the circle ear shapes out of the glitter felt, draw a generous amount of hot glue along the sides of the hat, and hold the ear in place until the glue dries
- you could also glue rick rack around the bottom edge of the hat
- make little crepe paper pom-poms or hot glue already made ones to the top

Posted by
Stacey - Elle Belle
at
6:27 PM
0
comments
![]()
Labels: baby booties tutorial, birthday hat tutorial, disney birthday, disney outfits, minnie mouse pillowcase dress, minnie mouse skirt, sewing
