


Check out this great treasury MonogrammingbyTammy snagged (she's got a great sale going on right now). She included my count and spell beanbags. Love how colorful everything is! Click on the treasury to check it out in person, the more people who click on items from it and leave comments the higher up it's ranked.
Saturday, November 29, 2008
Colorful Treasury
Tuesday, November 25, 2008
Featured Etsy Seller: Storybeader
An admittedly frustrated writer has found inspiration in the beaded pieces she makes. A love for writing and penchant for colorful jewelry is evident in the Etsy shop, Storybeader. Deb, the Storybeader, feels inspired to write by each piece she makes and includes a haiku written specifically for your piece with your purchase.
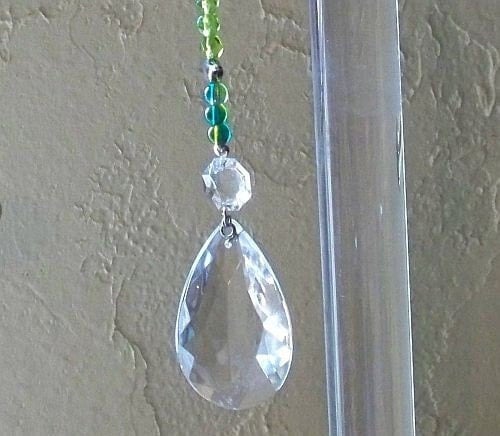
This sun catcher is my favorite! My Mom always hung a crystal in the dining room window. The mini rainbows that danced around the room during warm sunny mornings were a sweet way to greet the day!
Saturday, November 22, 2008
Sneak Peek - Tooth Fairy Pillows
Introducing, Elle Belle's newest addition, the cute, the cuddly, the keeper of toothy treasures, the bearer of fairy bounty...
The Tooth Fairy Pillow!  How cute are these little guys?!
 The braces are stitched with metallic thread
 The pocket on the back serves tripple duty - tooth storage, Fairy pay out, and panties for a little tooth butt... doesn't it look like panties???... okay maybe it's just me.
How cute are these little guys?!The braces are stitched with metallic threadThe pocket on the back serves tripple duty - tooth storage, Fairy pay out, and panties for a little tooth butt... doesn't it look like panties???... okay maybe it's just me.Stop by the Elle Belle shop next Monday to get a Tooth Fairy pillow for your favorite toothless little person!
Friday, November 21, 2008
An easy to make, stylish, useful, inexpensive gift!
What more could you ask for?!
This is a busy time of the year for Elle Belle, and I needed a spot to keep my to-do lists visible, calendar pages posted, reference thread charts, post flyers from shows I'm scheduled to sell at, and maybe even glean a bit of inspiration from. So I decided cork boards would do the trick. I put together a little tutorial of sorts below, make some for yourself to stay organized during this festive time of year, or for a friend who could use a little handmade goodness.

Here's what you need: Cork (I picked up a package of 4 12x12 cork tiles at a big box store for about $8), scissors, spray adhesive, a stapler (if you have a mini one that uses smaller staples so they don't poke out the other side of the cork tile that might save your fingers in the long run), some ribbon, the little adhesive thingies that come with the cork tiles to mount it to the wall, and fabric (I used some scraps I had left over from the Birdie bag I made).
 Step 1 - Cover the cork: Cut your fabric about an inch and a half bigger than your cork tiles (mine was smaller because I working with scraps). Lightly coat one side of the tile with spray adhesive and lay your fabric over the tile. Smooth the fabric out with your hand to remove any wrinkles. Flip the tile over and staple the excess fabric around the back.
Step 2 - Embellish: I laid the three covered tiles on the floor in the order that I wanted to hang them and laid pieces of coordinating ribbon on them in a pattern that I thought made a nice over all design and would also be functional for holding notes and such. Staple the ribbon onto the back of the tile.
 Step 3 - Finish: If I were giving these as a gift I would cut a piece of card stock about half and inch smaller than the tiles and glue it onto the back to cover all the staples and rough edges. Apply the adhesive squares that come with the tiles (I only needed one in each corner and one in the center). Get out your level and stick away! Or, tie them up with some string and add a handmade tag!
Monday, November 17, 2008
Mini Felt Stockings
I have the cutest little white feather Christmas tree that I display on my table at holiday craft shows. I've been using it just to decorate my space, but it draws so much attention I wanted to figure out a way to use it for product display.

So I made a few little felt stockings to hang on the tree that are the perfect size for the chubby crayons. They were really fun and super quick to make!
I found a this template for a mini stocking on Martha Stewart's website, printed it, cut it out, pinned it to some felt, and cut around it. Then I pinned some ribbons on, pinned two pieces of the felt together, straight stitched around it in a contrasting color and waalaa! I think they would be really cute if you used pinking shears to cut the "seam allowance" after you stitched them  together, but I can't find my pinking shears anywhere...
Now my only concern is that I'm going to have to keep saying "the stockings aren't for sale, just the crayons" :)
Friday, November 14, 2008
Holiday Happenings
Tis the season for lots of holiday craft shows and new products for the Mommies and little ones on your Christmas list!
Visit Elle Belle in person at the following events in the Tampabay area:
Nov. 22 - Mommy and Me Charity Fund Raiser: Serrano's Maternity and Infant Apparel 401 S. Parsons Ave. Suite F, Brandon
Nov. 30 - Holizaar: Studio @ 620, St. Pete
Dec. 5 - Holiday Shuffle: St. Pete Shuffle Board Courts 7pm-10pm
Dec. 14 - Atomic Holiday Bazaar: Sarasota Municipal Auditorium
Jan. 10 - New Year New Baby Maternity Open House: Look Who's Kickin' Ultrasounds, South Tampa
I debuted some new products at the Handmade Holiday Bazaar and will be taking pictures this weekend so that I can list them the beginning of next week. A custom banner, the newest addition to the tattoo inspired line of slings, and a super cute new embroidered tooth fairy pillow all coming just in time for Christmas!
Wednesday, November 12, 2008
Handmade Holiday Bazaar Wrap Up
So I’ve been a vendor in many many many craft shows since the inception of Elle Belle. The vast majority of the shows are put on by big organizations or promoters, and not by people who are crafters/artists or have ever been a vendor themselves. So, I decided to try my hand at organizing and promoting a vendor centric show. I partnered with a vendor I met at a “mass manufactured” show last year and pitched the idea of hosting a new brand of craft show to the owner of a local fabric shop, Fiberologie. She was excited about the idea and we made the arrangements to transform Fiberologie’s parking lot into the Handmade Holiday Bazaar. It was a labor of love that came together last Sunday. Among the various vendor centric approaches we took, was a survey we distributed to each vendor the morning of the show and asked them to provide their feedback (anonymously) by the end of the day. I found quite a bit of it interesting, not only with regard to the Handmade Holiday Bazaar, but also just about craft shows in general. Even if you weren’t a vendor or didn’t go to HHB, I hope you’ll take a minute to peruse the feedback and weigh in on the poll on the right margin. So here you have it - the good, the … well not too, but for the sake of this little pun… the bad, and the crafty:
The survey consisted of 16 questions in “strongly agree, agree, disagree, strongly disagree” format, 5 essay style questions, and a place for general comments (we were super happy that all the vendors except 2 worked that hard to give us their review!).
- The million dollar question – Are you happy with your sales during the event? 68% of the respondents strongly agreed or agreed. Interesting fact: of the vendors in the “disagree” or “strongly disagree” category, 25% wrote a note in the margin to the affect of “not in the control of the promoters”.
- The questions pertaining to the promotion of the event were: I am happy with the number of customers in attendance, the customers in attendance were in my target market, the event was sufficiently promoted/advertised. 78% strongly agreed or agreed. Note: the bazaar was promoted on multiple web sites, in print in 4 major local publications (TBT, St. Pete Times, Creative Loafing, and Skirt!), a month long ad ran in Skirt!, 600 full color glossy flyers were distributed throughout the community, and two road signs were displayed the day of the show.
- Here’s that vendor centric stuff I was talking about: I am happy with the diversity and type of vendors in attendance, I liked the arrangements made for lunch, the packet of vendor information I received in the mail was useful, the demos/make-n-takes enhanced the show, I am glad there was live music, the vendor features on the blog gained exposure for my shop and/or the show, the goodie bags were a worthwhile addition to the show. 98% strongly agreed or agreed.
- How did all that planning come together? The questions were: The event was well organized, I think the booth/table fee was reasonable, I liked the location of the event. 97% strongly agreed or agreed Note: table fees were $40, booth fees $60
- And now for some constructive criticism, the question was: What could’ve been done differently to better ensure your success as a vendor at the show? Here are a few of the responses: Larger signs on the street corners and at the park. Bigger locale. Hold the event closer to Christmas time. These responses prompted the poll I added to the right margin of my blog. I’d like to know, as a vendor - What you think is the best way to allocate your marketing/advertising funds?
- What did the vendors like the most about Handmade Holiday Bazaar?: It was very well organized. Location. Great mix of crafts. I liked the fun, trendy vibe. It was not your typical traditional craft show. Diverse crowd that was willing to spend. Wonderful selection of vendors. Stacey & Julie Rock!
- For all of you who are planning or would like to plan a show of your own, here’s what these vendors say would help them decide to do your show: Cost, location, dates, past history, advertising/exposure, diversity of vendors, size, the toss of a coin.
It was a really fun day, there were a ton of wonderful handmade items for sale (I made the comment a couple of times that it was like walking through my Etsy favorites page), and I met some of the nicest most talented crafter/artists. That’s definitely a success in my book!
Monday, November 10, 2008
My first bag!
I can hardly think of a better way to spend a Saturday morning than in sewing class! I love creating something new, having a completed one to reference in the process, and getting direction from someone else so I don't have to pour over the pattern instructions. Fiberologie is a wonderful place to take a class, surrounded by beautiful fabrics, in a homey setting, and the best lunch, a greek salad is just steps from the back door at Louis Pappas... deelish! The last time my Mom was visiting she saw Amy Butler's Birdie bag in Fiberologie and wanted me to make one for her. I'm not really into purses/bags that much (I've had the same two Coach bags for the past 4 years) so this was my first bag. It won't be my last, I'm hooked! I had so much fun makeing it and am super happy with how it turned out. So here you have it (not great pictures... my brand new camera sucks... if I'm not outside or right near the window this is as good as it gets):


Saturday, November 1, 2008
Super E!

It's an adorable little girl, it's the smartest 3 year old I know, it's SUPER E!
I made most of Elle's costume this year. Here's the run down on how each of the pieces came together.
Circle Skirt: I found this great white star print for the skirt at a really neat old school fabric shop in St. Pete, Jay's Fabric. I conserved fabric by buying just half a yard, cut it in half, and sewed it together to make a big square of fabric. To figure out the size hole to cute for the waist, I measured Elle's waist added 1 inch for seam allowance, divide it by Pi (3.14), and divide that number by 2, this is the radius of the circle to be cut. Then I folded the fabric in half length wise, and in half again width wise, used pins to hold it in place. With the 0 mark of a ruler on the center point of the folds I made little tick marks at the radius measurement several times at different angles and then connected the tick marks and cut along the line. Unpin and unfold the fabric, waalaa a circle :) Next I Sewed a little hem around the circle and fed a piece of elastic just a half inch shorter than Elle's waist measurement into the pocket, sewed the elastic together, and finish the hem. Since my fabric was a stretch knit I hung it from the waist elastic on a hanger with clips and put it in the bathroom so that it could "relax" in the steam the next time we took showers. Then I put the skirt on Elle, marked where I wanted the hem, laid the "skirt" out on my foam cutting/measuring/pattern board thingie, measured from the center of the cut out circle to the mark I made for the hem, cut a piece of sting that length, tied a piece of chalk to one end of the string and stuck the other end of it into the board at the center of the circle with a push pin and drew a chalk line all around the skirt. I cut along the chalk line then folded the skirt in half and could see any parts where I needed to trim one side or the other to make it a perfect half circle. Hemmed it up and she had an adorable little skirt, no pattern required!
Tutu: Elle has worn a tutu every year for Halloween and I thought she was gonna get away without one this year, but when I put the circle skirt on her there was just something missing... all things little girl are better with a tutu right?! Tutu's are super simple to make, but I made her one last year and learned a few things, so here's what I think is key. 1)Don't scrimp on the tulle. Even good quality tulle is pretty cheap, so buy nice soft tulle. 2) use a wide elastic, like what you would find in guys boxers. All you have to do is cut your elastic 1/2 inch shorter than the waist measurement, stitch it together. Then cut the tulle in strips as wide as you want (Elle's were 3 inches wide, but you can make them skinnier if you want, it's just a matter of preference... I don't think I'd go any wider than 3 inches though)and twice the length you want the finished tutu to be + 1 inch. Then you just tie the strips to the elastic by folding the strip in half, place it behind the elastic and pull the ends around the elastic and through the loop created by folding the tulle in half. Repeat until you've covered the elastic.
Vinyl Belt & Cuffs: Gotta love working with a material that doesn't fray! All you have to do is cut out the shape you want, stitch some Velcro to each end... instant super hero accessories!
Cape: So I've been crazy busy and decided to buy the cape from a shop on Etsy instead of making one myself. I'm glad I did because I bought a blank cape from Super Fly Kids with the intention of embroidering the Super E logo on it and didn't even get a chance to embroider it.
Creating the super E logo was a little challenging with the software I have, but I couldn't be happier with how it turned out... someday I'll get around to embroidering a bigger version of it on her cape because it'll definitely be in the circulation of most played with "toys". Elle loves running around in it and can't resist looking behind her to watch it flow in the wind!
Subscribe to:
Posts (Atom)


