Thursday, June 24, 2010

Homemade Baby Food

It’s been a baby food bonanza here on my blog lately! I posted about the baby foods we just can’t get enough of, sprout organic baby food, plum organics, & revolution foods & I posted the tutorial I created for the bib with a pocket to carry the pouches. So one last thing about baby food and then I promise to force myself to obsess about something else… probably party planning (I have 3 parties coming up)!


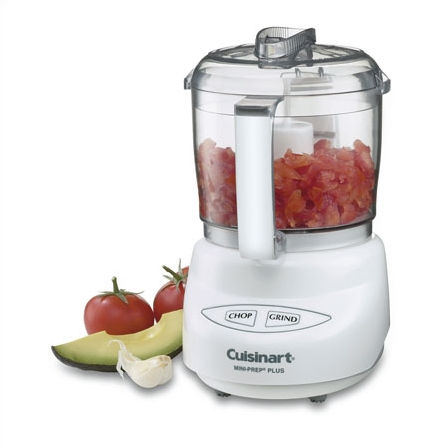
CSN Stores asked me to review one of their products… it was seriously hard to choose what I wanted to review… they have 200+ stores with pretty much whatever you could want! I picked the Cuisinart Mini Prep Plus Food Processor so that I could… you guessed it… make baby food!

With this lovely little gadget, it really couldn’t be easier to make food for your littlest eater! Every evening, after I’ve prepared dinner, I fill the bowl with a portion of each thing we’re eating. Veggies, potatoes, rice, pasta, chicken, turkey, whatever we’re eating for dinner, goes into the bowl. Twist the lid on and hit the grind button a few times. If it’s too dry, add a little water and grind it up again. The Cuisinart Mini Prep Plus makes just the right amount of baby food, doesn’t take up much space on your counter, and makes quick work of mashing it all up to the perfect consistency. I feed her a serving size during our family dinner and the rest I scoop into an ice cube tray. I write what the meal is on the outside of a Ziplock freezer bag & the date that it should be eaten by (3 months is a good rule of thumb), slide the ice cube tray into the ziplock and put it in the freezer. Before bed, I pop the cubes out of the tray into the bag, seal it up, and I have a meal or two or three, depending on how much leftovers we had, for another day.

The cubes are obviously not as convenient to use on the go as the pouch food, but they thaw quickly and are great for meals at home. There are so many studies to support feeding babies a wide variety of wholesome foods early in their lives to help establish healthy eating habits and taste preferences. Making your own baby food is an easy way to start your baby off right!

If you live in Florida, you can join the Fresh from Florida Kids program for free and they’ll send you a free kit with quite a few goodies, including ice cube trays, a recipe book for making nutritious baby and kid friendly meals, & a little manual grinder for making baby food too. I just got my kit the other day, it’s a neat program, and definitely worth checking out!

If you make your own baby food, leave me a comment with your favorite "recipe" so we can try it out too!

Tuesday, June 22, 2010

Pouch Bib Tutorial

I posted a month or so ago about the Sprout Organic Baby Food that Liv eats & how much we love its simple organic ingredients & that it’s super easy to carry in the diaper bag too. I’ve seen bibs with pockets to hold a spoon and placemat or wipes & adapted that concept for use with the pouches (although you could still use it for a placemat or whatever you’d like).

This is probably my most in depth tutorial so far, so let me know what you think and if you give this one a try. Have fun!
You’ll need:
This pattern for the bib (print both pages, turn them to landscape orientation, tape pg 1 & 2 together where the lines meet, and cut it out)

two coordinating fat quarters (you can get two fronts out of a fat quarter, but only one back plus the pocket)

A 9”x12.5” piece of batting

Coordinating cotton thread

Velcro or snaps

9” piece of ¼”elastic

1) Cut the bib pattern out of the fabric for the front of the bib. Cut a 9”x12.5” rectangle from the fabric for the back of the bib.

2) Cut an 8” x 9” rectangle from the fabric for the back of the bib. Fold the rectangle in half long ways and press (so you have a 4” x 9” piece with the fold at the top).

3) Quilt the back of the bib: Place the fabric for the back of the bib on top of the batting and quilt them together. Pin the bib pattern on top and cut it out.

4) Attach the pocket: Place the fold of the rectangle from step 2 on top of the quilted back of the bib, along the pocket placement line, with the raw edges of the pocket aligned with the raw edges of the back of the bib. Pin in place and stitch the 2 sections of the pocket.

5) Place the elastic just below the top of the pocket. Place the front of the bib face down on top of the quilted back of the bib & elastic. Pin all the way around the bib and be sure to pin through the ends of the elastic too.

6) Sew all the way around the bib with a ½” seem allowance, leaving an opening in one side, above the pocket, to turn through. Trim and snip into the seam allowance around the curves of the neckline and where the bib will close so that it will turn smoother.

7) Turn the bib right sides out, press, & top stitch all the way around.

8) Sew on the Velcro or snap closure

Are you wondering about the elastic?  Load up your bib with a baby food pouch or a placemat, and a couple spoons.  Close the bib and tuck the neck part under the elastic. Fold the sides of the bib in towards eachother, twist the elastic and loop it around the bib to keep it all together in a nice little package.

Monday, June 21, 2010

Muffin Tin Monday

It's Muffin Tin Monday!  We started our morning off with a muffin tin breakfast:

No theme really, just Elle's special requests for breakfast... cinnamon sugar toast, blueberries, cherries, fig newtons, and whipped cream for the fruit.  I didn't have much of a plan for this one at all, but while she was eating it she said "Mommy I really like how you put all the crunchy things in blue cups, all the sweet things in pink, and the fruits in yellow"... that's so Elle, always praising, always appreciative, and always looking for order :) 

Check out Muffin Tin Mom for lots more muffin tin fun from today and to join in if you'd like!

Wednesday, June 16, 2010

We have a winner!

And the winner of $20 worth of organic baby foods from ecomom.com is... drumroll please... La Yen!  Congratulations!  I'm emailing you now.


Are you all tired of giveaways? Yes, you'd rather have tutorials?  Okay, let's do tutorials.  I have the one for the bibs with a back pocket ready to go, I just need to download the pictures... by the end of the week!


Wednesday, June 9, 2010

Plum Organics and Revolution Foods Giveaway!

I’m practicing my best “sunday SUNDAY SuNdAy” crazy car dealership commercial voice to announce that I have yet another giveaway for you! AND if you’re not feeling particularly lucky, you don’t have to pout about never winning these things, you can just use a discount code I have for you! So come on down, don’t delay, act now, cuz we’re going CRAZY!

Alright enough of that… just thinking about those ads is annoying. Want to know what you can win? Peace of mind in the fact that you’re making a healthy choice for your little one, by the way of eco-friendly baby products by EcoMom. EcoMom sent me a Plum Organics & Revolution Food sampler for Liv to try out.

I’ve mentioned here before, about my quest to find healthy organic foods that will not only be great nutrition (simple organic ingredients are all you’ll find on these labels), but also help develop a palate and preference for a wide variety of food. I love that Liv opens her mouth, wide as can be, for flavors like pumpkin/banana, spinach/peas/pears, and peach/apricot/banana! Check out that packaging. You know how much I love the pouches because they’re so easy to toss in a diaper bag, but these brands take it to the next level with those tops. You just twist off the cap, and it’s like a straw sealed to the top of the bag. You can squeeze the food into a bowl, use a nifty spoon you can get specifically designed to attach to the bag, or squeeze it directly into a baby spoon. We went to a busy birthday party where there wasn’t space at a table for us to sit at, let alone a highchair available; Liv sat in my lap while I squeezed the food into a baby spoon and fed it to her without a bit of a mess. It was so convenient and I got accolades from the other Moms for being so resourceful ;)

This amazing food is just the tip of the iceburg for Plum & Revolution and also for ecomom.com Plum & Revolution offer a wide variety of products from the high chair to the lunch box… way more goodies than ecomom could have possibly sent me… not that I would’ve complained! And EcoMom has an awesome program called EcoPass where members get 15% off and free shipping on EVERYTHING they buy from ecomom.com, with no minimum requirement. It’s $99 for a one year membership, but as of today when I’m posting this, you get a $50 gift card for signing up! Wouldn’t it be wonderful to have wholesome organic baby foods shipped directly to you instead of having to run out to the store with a fussy baby in tow when you realize that you sent the last pouch to the sitter?!

Did you guess that we’re giving away some Plum and/or Revolution foods? You’re right… $20 worth + free shipping… you’ll get to pick the flavors you want to try out! Here’s how you can win:

Get one entry for each of the following (just leave me a separate comment for each one that you do):

1) If you want to keep up with what I’ve got going on here in my little piece of the blogosphere (or if you’re already one of my most favorite people ever a.k.a. my blog followers) you can get an entry for following my blog.
2) Check out ecomom.com and join their newsletter
3) Follow the fabulous CEO & Co-Founder of EcoMom, Jody, on twitter
4) Become a fan of EcoMom on facebook

I’ll pick a winner, at random, on June 15th. Residents of US and Canada are eligible to win.

If you can’t wait to see if you won the $20 of Plum & Revolution foods or if you want to buy any of the other great stuff on EcoMom.com you can use this 15% discount code through June 30, 2010: SBBL395


This blog is a personal blog written and edited by me. This blog does not accept any form of cash advertising, sponsorship, or paid topic insertions. However, we will and do accept and keep free products, services, travel, event tickets, and other forms of compensation from companies and organizations.
The owner(s) of this blog does not receive compensation in any way from this blog.
The owner(s) of this blog is not compensated to provide opinion on products, services, websites and various other topics. The views and opinions expressed on this blog are purely the blog owners. If we claim or appear to be experts on a certain topic or product or service area, we will only endorse products or services that we believe, based on our expertise, are worthy of such endorsement. Any product claim, statistic, quote or other representation about a product or service should be verified with the manufacturer or provider.

To get your own policy, go to http://www.disclosurepolicy.org
(I did the disclosure in super small font as a homage to the car dealership ads... sometimes I crack myself up!)

Tuesday, June 1, 2010

Puppet Theatre

My parents were visiting from IL last week. Not 5 minutes after they walked through the door, Elle already had a request for a craft project… because you know… Grandpa’s can make or fix anything!! A piece of white matt board, some masking tape, an exacto knife, markers, and some letter stickers later, Elle’s puppet theatre celebrated its opening night. Grandparents are the best!

Easy Kid's Beach Cover-up


We've had lots of birthday parties to attend lately and I usually make embroidered hooded bath/beach towels (here's a tutorial for you or you could buy one here) for the kiddos since they're a good gift for a wide variety of ages, but we've been friends with this little one for her previous two birthdays and I couldn't remember if I had already made her a hooded towel, so I decided to break the mold... just a bit... with a smocked terry cloth swim suit cover up, and a beach towel backpack (I'll give you a peak at that some other day).

The cover up is easy to make using elastic thread, there's just a few things to know before you get started.

1) I read a bunch of tutorials on how to do elastic thread smocking.  Some said wind the thread tightly on your bobbin, some said wind it loosely.  Some said iron it when you're done, some said wet it when you're done.  The moral of the story is you have to try it out on a scrap of the fabric you're using for your project first.  I used terry cloth here, so in this application I found it works best to wind the elastic thread tightly around the bobbin & then spritz it with water when you're done sewing to get a bit more gather out of it.

2) Because it will gather so much, your fabric should be the width you measure + half.

3) The elastic thread goes in your bobbin only, use regular thread on top

Okay, so with those few things in mind, all you do is cut a rectangle of fabric the width of the child's chest measurement + half, and the desired length + 1" to account for gathering and the bottom hem.  I overcast stitched along the top & bottom length of the rectangle and then hemmed the bottom only.  If you're concerned with the smocking being straight (I would be if I were using any fabric other than terry, but a little wavyness isn't terribly obvious on the terry) mark about 6 or so lines across the top of your fabric with disappearing ink, spaced 3/4" apart.  Sew along your lines.  When you're done, spritz the elastic with water, then sew the sides together to form a tube.  Using more terry, or cording, or braided puffy yarn (like I did), make straps for your dress and sew them about 3" in from the edge of the dress.  If you have an embroidery machine, definitely stitch a cutesy design near the hem (I bought this popsicle design from Digital by Design on Etsy.  It coordinates with the beach towel I used for the backpack I made to give with this cover up).   That's it!

I'm thinking I could even pull off an adult version of this... what do you think?

Related Posts Plugin for WordPress, Blogger...
 
Simply Yours Designs Cute Blogger Templates